#!/usr/bin/env python3
# CNC_Index_Driver_2025.8.28BV3 with 1/32 microstepping and brake
# Copyright ©2024-2025 Dayton Taylor
import os # operating system functions for shutdown when finished
import sys # system functions to support exit option at end of process
import RPi.GPIO as GPIO # general purpose input output functions for stepper motor GPIO controls
import time # for time delay function
from datetime import datetime # module to get time and date for display (only works with
# an internet connection because stock Rasberry Pi doesn't have realtime clock)
#
# HR8825 stepper motor chipset driver
from HR8825 import HR8825 # chip-specific function module for Waveshare stepper motor HAT (B)
#
# GPIO functions for button control for e-paper display buttons
from gpiozero import Button # GPIO functions for button control for e-paper display buttons
from gpiozero import Buzzer # GPIO function module for audible system ready prompt
from gpiozero import TonalBuzzer # Buzzer module of tonal functions for audible system ready prompt
from gpiozero.tones import Tone # TonalBuzzer module supporting TonalBuzzer tone profiles
from gpiozero import OutputDevice # GPIO functions for relay control for stepper motor brake
#
#import epd2in7 # function module to support Waveshare e-paper 2.7 inch black & white e-paper display driver
from waveshare_epd import epd2in7_V2
from PIL import Image, ImageDraw, ImageFont # display drawing functions to support drawing on e-paper display
#
from pygame import mixer # game design module to support audible system ready prompt when speakers are available
# the two lines below initiate the pygame .wav player for beep sound (beep prompt only works when external
# sound output device is available and selected in system sound preferences)
mixer.init()
alert=mixer.Sound('/home/pi/CNCIndexDriver/python/wave1.wav')
#b initiate TonalBuzzer module in gpiozero
b = TonalBuzzer(2) # set TonalBuzzer signal output pin to GPIO pin 2
#brake - initiate brake output in gpiozero
brakerelease = OutputDevice(3) # set brake signal output pin to GPIO pin 3
# assign gpiozero support for e-paper display buttons to physical GPIO pins on Waveshare e-paper display
buttonA = Button(5)
buttonB = Button(6)
buttonC = Button(13)
buttonD = Button(19)
epd = epd2in7_V2.EPD() # use the epd2in7_V2 module to name the e-paper display 'epd'
epd.init() # initialize the display by referencing its name and the 'init' function
print("") # print a carriage retutn (blank line) to console (command line terminal window)
print("Clear e-paper display") # print text to indicate that the e-paper display is being cleared
print("") # print another blank line
epd.Clear() # clear the display by referencing its name and the 'clear' function
def printToDisplay(string): # define what happens when e-paper printToDisplay function is called
epdImage = Image.new('1', (epd2in7_V2.EPD_HEIGHT, epd2in7_V2.EPD_WIDTH), 255)
draw = ImageDraw.Draw(epdImage) # create draw object and pass the image layer epdImage
# set the font paths, file names, and sizes (Font.ttc is the GilSans TrueType font)
font = ImageFont.truetype('/home/pi/CNCIndexDriver/Font.ttc', 18)
fontsmall = ImageFont.truetype('/home/pi/CNCIndexDriver/Font.ttc', 12)
fontsupersmall = ImageFont.truetype('/home/pi/CNCIndexDriver/Font.ttc', 9)
draw.line((36, 23, 264, 23), fill=0) # draw top line
#
# The line below is the text on the display that changes step-by-step.
# The remaining elements below it are the same on every page.
# draw the page text (page1, page 2, page3 or page4) starting 42 pixels to the right and 2 pixels down
draw.text((42, 2), string, font=font, fill=0)
#
# draw the bottom section of the screen with copyright, date and time.
# assign the name 'now' to the current date and time
now = datetime.now()
# define the layout of the datetime string using the function 'strftime'
dt_string = now.strftime("%Y / %m / %d %H:%M:%S")
# strips the first two characters (20 from 2024) off the date time string
dt2_string = dt_string[2:]
#
draw.line((36, 158, 264, 158), fill=0) # Draw bottom line
# draw the © and Date Time String text at bottom
draw.text((44, 160), f"©2024 Dayton Taylor {dt2_string} ", font=fontsmall, fill=0)
# draw the left section of the screen with button descriptions
draw.text((2, 0), f""" A """, font=font, fill=0) # buttonA Text
draw.text((2, 18), f""" Start """, font=fontsupersmall, fill=0) # buttonA Text
draw.text((2, 28), f""" Process """, font=fontsupersmall, fill=0) # buttonA Text
draw.line((36, 0, 36, 176), fill=0) # vertical line to the right of button descriptions
draw.text((3, 45), f""" B """, font=font, fill=0) # buttonB Text
draw.text((2, 63), f""" Load """, font=fontsupersmall, fill=0) # buttonB Text
draw.text((2, 73), f"""Program """, font=fontsupersmall, fill=0) # buttonB Text
draw.line((0, 44, 36, 44), fill=0) # horizontal line under the buttonA description
draw.text((1, 89), f""" C """, font=font, fill=0) # buttonC Text
draw.text((2, 107), f""" Run """, font=fontsupersmall, fill=0) # buttonC Text
draw.text((2, 117), f"""Program """, font=fontsupersmall, fill=0) # buttonC Text
draw.line((0, 88, 36, 88), fill=0) # horizontal line under the buttonB description
draw.text((2, 133), f""" D """, font=font, fill=0) # buttonD Text
draw.text((2, 151), f""" About """, font=fontsupersmall, fill=0) # buttonD Text
draw.text((2, 161), f""" Exit """, font=fontsupersmall, fill=0) # buttonD Text
draw.line((0, 132, 36, 132), fill=0) # horizontal line under the buttonC description
#this function sends the image that has been created above (epdImage)to the display
epd.display(epd.getbuffer(epdImage))
time.sleep(2)
def handleBtnPress(btn):
# switcher number represents the GPIO button pin number
# value is the message it will print - variables page1 - page4 will be defined below
switcher = {
5: f"{page1}",
6: f"{page2}",
13: f"{page3}",
19: f"{page4}"
}
# get the string based on the passed button and send it to printToDisplay()
msg = switcher.get(btn.pin.number, "Error")
printToDisplay(msg)
# tell the buttons what to do when pressed
buttonA.when_pressed = handleBtnPress
buttonB.when_pressed = handleBtnPress
buttonC.when_pressed = handleBtnPress
buttonD.when_pressed = handleBtnPress
# now that we've initated the functions and defined the screen layout and button behavior
# we can begin the full program 'while True' loop so the process can be repeated multiple times
while True:
# The section below is the initial text for the screens that are called when you press a button.
#
# Note that this text is updated later in the script and can contain variables
# provided that they are initialized and are if the type 'string'
# the reason this text is inside of the first 'while True' loop is so that page3 is reverted back to its
# start condition if the process is restarted, which is one of the options at the end of the script
#
# Note also that page3 is initiated for a special condition where button C is pressed before
# n has been defined - it will be redefined to contain applicable variables
# after those variables are initiated
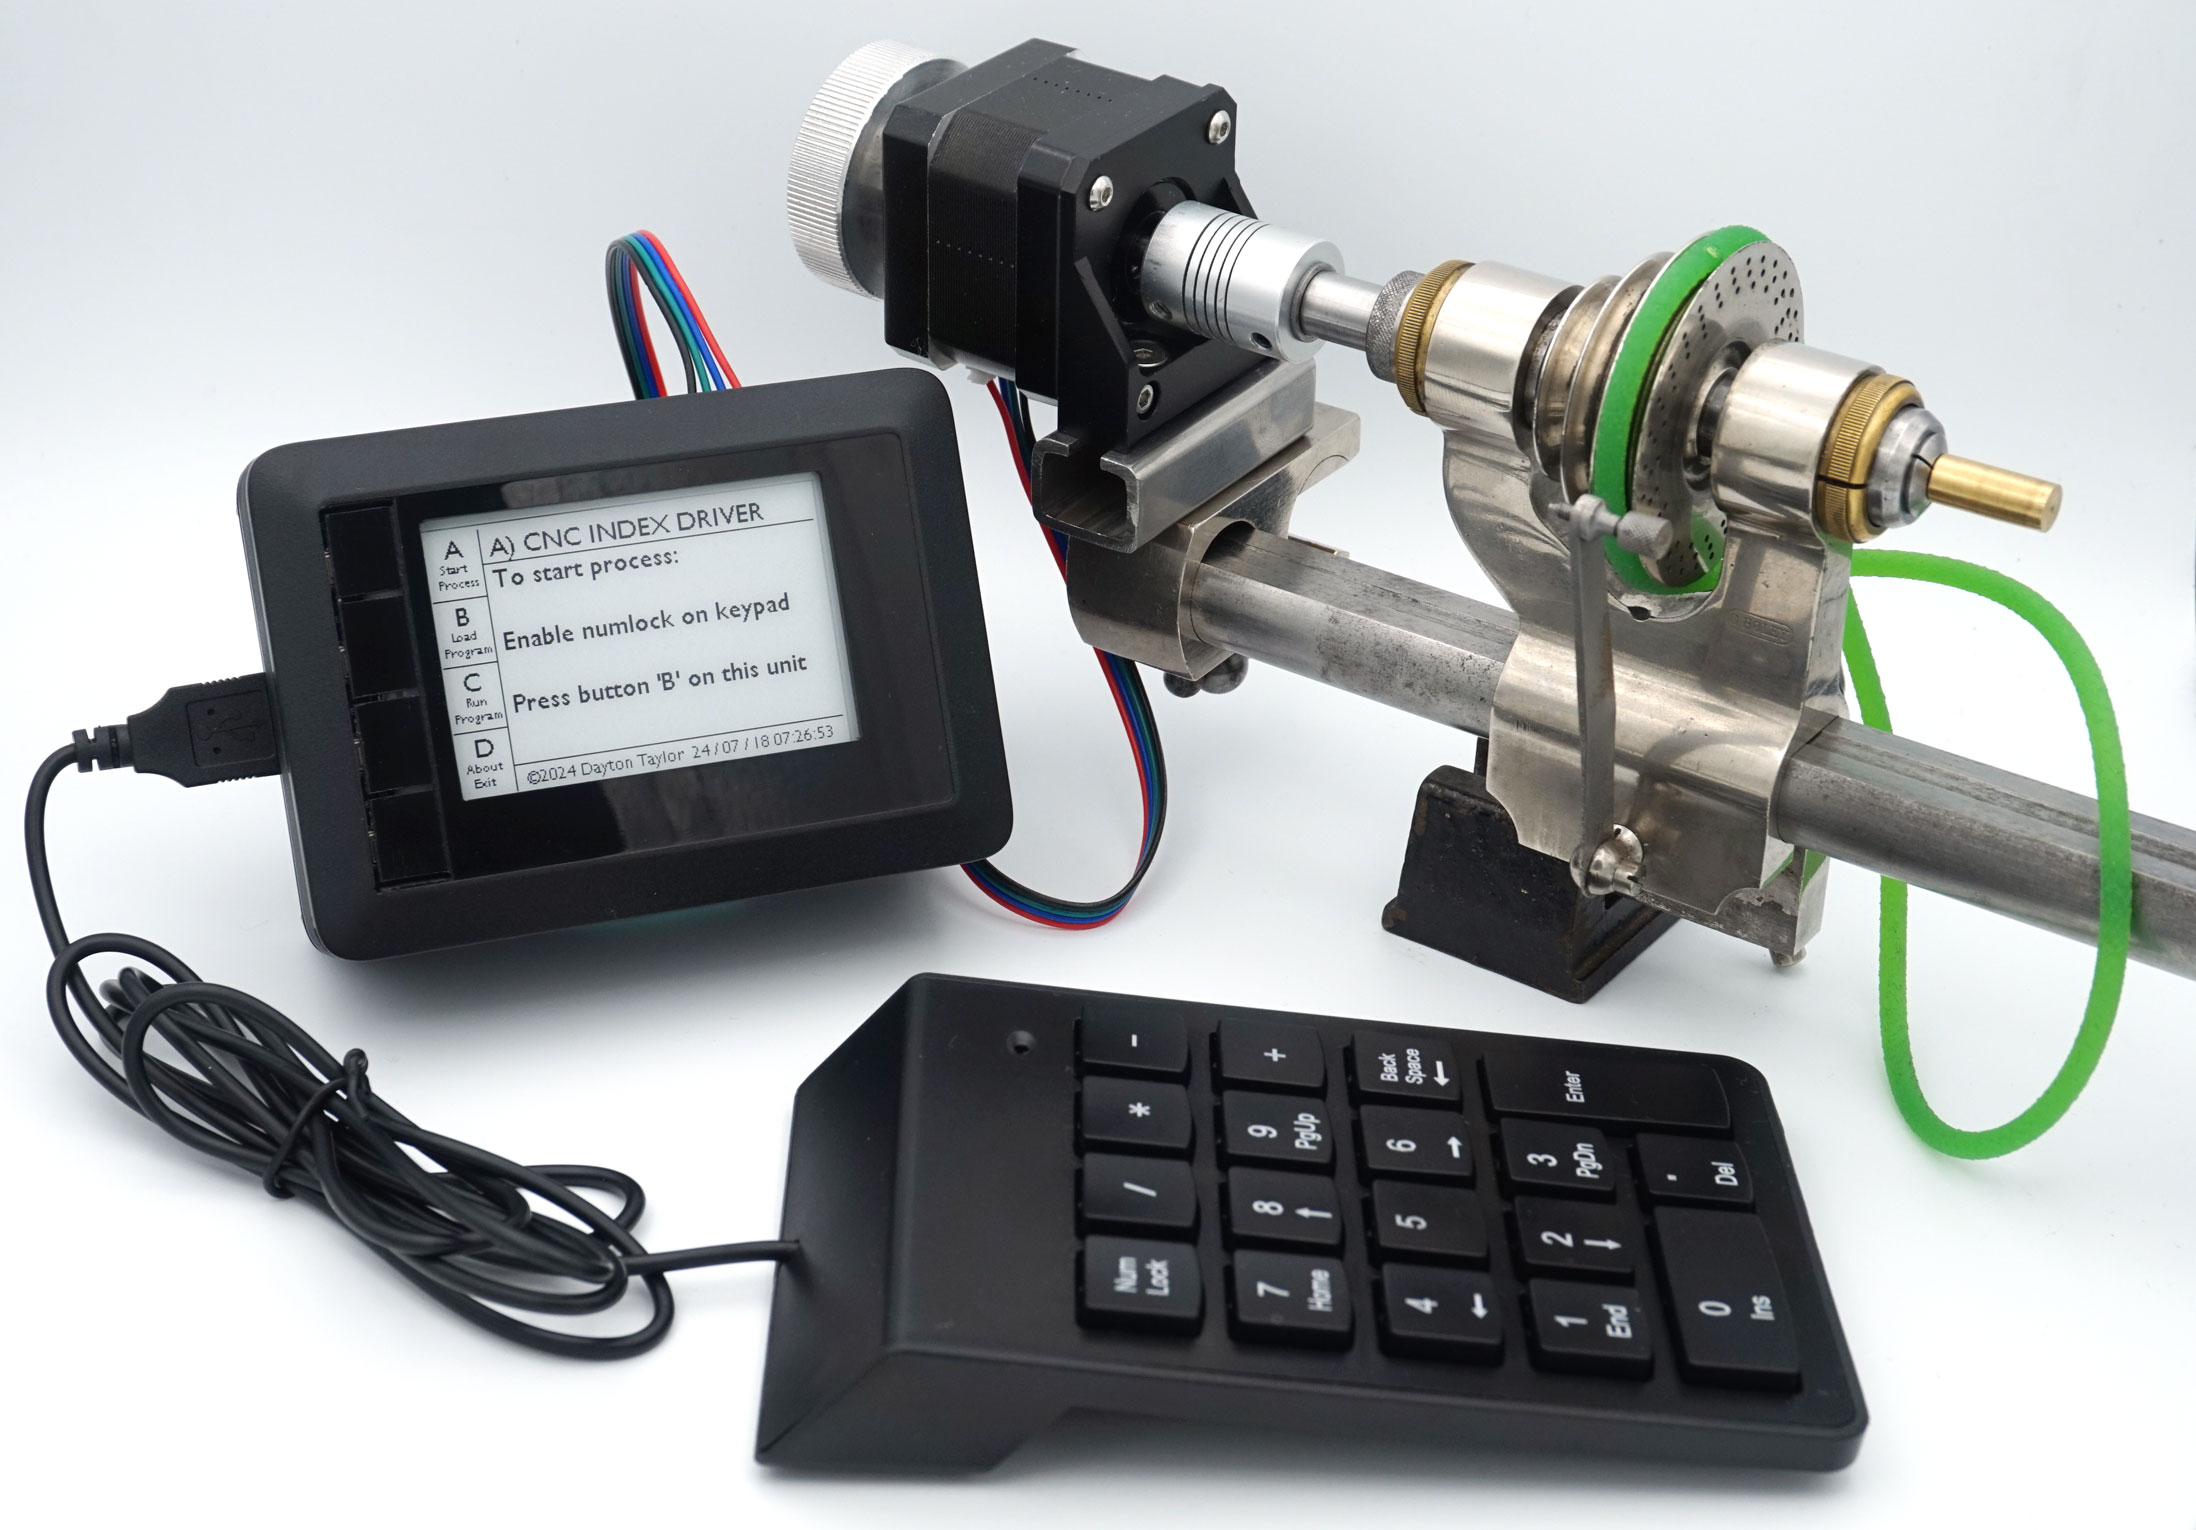
page1 = f"""A) CNC INDEX DRIVER
To start process:
Enable numlock on keypad
Enter 1 to enable buzzer
Enter 0 to disable buzzer
Press button 'B' on this unit
"""
page2 = f"""B) LOAD PROGRAM
Enter number of gear teeth
Wait for backlash reset
Wait for display prompt and
beep before cutting each slot
"""
page3 = f"""C) RUN PROGRAM
You may now cut gear
slot 1
When finished enter 1
(or 999 to return to
zero position)
"""
page4 = f"""D) ABOUT / EXIT
Enter 0 to shut down
Enter 1 to start over
Enter 2 to end the program
12V, 3A, CNC Index Driver
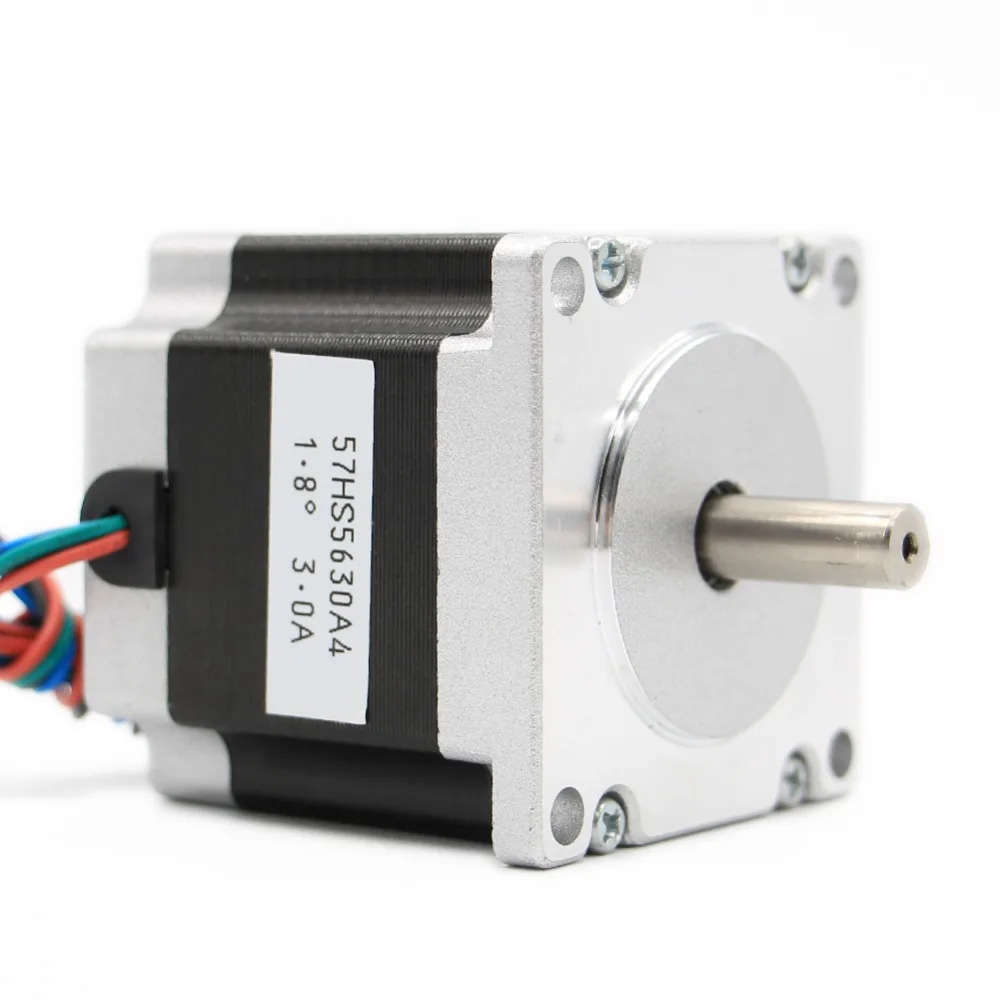
HR8825 200 Steps/360 1.8º
1/32 Microsteps, 6400 Steps
"""
# this next major section of the script initiates the process by asking the user to input the number of gear
# teeth to be cut before dropping into the loop that will repeat for each position
#
# start the user interface - both the command line and the e-paper display begin guiding the user through
# the process
try:
print("Print 'Start Process' instructions to e-paper display")
print("")
printToDisplay(page1) # Print e-paper page1 contents to e-paper display.
#
# set up motor driver GPIO driver (this must be done initially
# and again each time e-paper printToDisplay has been called to toggle between GPIO control
# by the gpiozero module (which controls the display) and the RPi.GPIO module (which controls
# the stepper motor)
#
Motor2 = HR8825(dir_pin=24, step_pin=18, enable_pin=4, mode_pins=(21, 22, 27))
#
# this next section is a comment noting microstepping command syntax for the stepper motor
# this script is designed to use microstepping with no gearbox at 1/32step microstep resolution
# this is equivalent to 6400 steps per 360 degrees of rotation
#
"""
# 1.8 degree: nema23, nema14
# softward Control :
# 'fullstep': A cycle = 200 steps
# 'halfstep': A cycle = 200 * 2 steps
# '1/4step': A cycle = 200 * 4 steps
# '1/8step': A cycle = 200 * 8 steps
# '1/16step': A cycle = 200 * 16 steps
# '1/32step': A cycle = 200 * 32 steps
"""
#
# mirror e-paper Start Program page instructions to command line console.
print("To start process:")
print("Enable numlock on keypad if present")
print("Enter 1 to enable buzzer")
print("Enter 0 to disable buzzer")
while True:
try:
z = input("Enter 1 or 0: ")
z = int(z)
if z == 0:
break
elif z == 1:
break
except:
print("Invalid input") # prints error to console if input is not numeric
# and then loops back so user can try again - if you're only using the e-paper
# display there is no error message but you can nevertheless try again
print("")
print("Press button 'B' on the controller")
buttonB.wait_for_press()
#
# get the number of gear teeth to be cut while also checking that the input is numeric
# check is because numeric USB keypads output non-numeric ASCII codes when numlock is inactive
# checking with "while True" loop allows user to keep trying until they get it right
# (fopr example if they forgot to enable numlock)
#
while True:
try:
t = input("Enter the number of gear teeth: ")
if t.isnumeric():
break
except:
print("Invalid input") # prints error to console if input is not numeric
# and then loops back so user can try again - if you're only using the e-paper
# display there is no error message but you can nevertheless try again
#
t = int(t) # make t an integer type variable as gear teeth can only be integers
a = 360.0/t # calculate the angle "a" per tooth by dividing 360 by the number of teeth
# save a rounded to 3 decimal places version of the variable "a" for use on the display
# so we're not displaying unnecessary / irrelevant decimal places
angle = round(a,3)
time.sleep(0.5) # pause for a half second
print("")
print(t,"gear teeth calculated")
print("")
print("Wait for backlash reset")
print("")
# 100 steps is approximately 5 degrees at the current 1/32 step microstepping ratio
print("Rotating 100 steps (~five degrees) to zero out any backlash in the gear train")
print("")
time.sleep(0.5)
# the next line uses gpiozero TonalBuzzer to play a tone on a hardware buzzer inside the controller
# this tone plays whenever the motor is moving as a reminder not to move the cutter while the motor
# is active
if z == 1:
b.play(Tone(220.0)) # start playing a 220 Hz buzz audio prompt through gpiozero tonal buzzer hardware
brakerelease.on()
Motor2.SetMicroStep('softward','1/32step') # set the motor mode to fullstep under software control
#
# reverse & then advance ~5 degrees to take up any backlash (slack) in the gear train.
#
# note that because the forward and reverse numbers cancel each other out this process
# can be repeated without skewing relative teeth positions for multiple cutting passes
# or to resume cutting after a temporary interruption (i.e. forgetting to cut a slot, or
# realizing that the slots all need to be deeper, or changing cutters, etc.)
#
# also note that if direct drive microstepping is used without a gearbox
# there should not be any backlash in the direct driving of the drawbar
# however, because of the snapping into position when any stepper motor is first powered on
# it's good to leave this bit in - it also allows you to check that the motor is controlling the spindle
# and that the spindle is moving freely before cutting the first slot
#
Motor2.TurnStep(Dir='backward', steps=100, stepdelay = 0.003)
time.sleep(0.5)
if z == 1:
b.stop() # turn off the 220 Hz buzzer to indicate that the motor has stopped moving
time.sleep(0.25)
if z == 1:
b.play(Tone(220.0)) # start playing a 220 Hz buzz audio prompt through gpiozero tonal buzzer hardware
Motor2.TurnStep(Dir='forward', steps=100, stepdelay = 0.003)
time.sleep(0.5)
if z == 1:
b.stop() # turn off the 220 Hz buzzer to indicate that the motor has stopped moving
brakerelease.off()
#
# set cummulative step register (totalsteps) to 0 before starting loop
# this is necessary to calculate the absolute position of the motor to compensate for
# rounding errors because the number of integer steps per gear slot cut can vary plus or
# minus one step as a result of rounding
# this variation is only 1/6400 of a 360 (0.0562 degrees), which is equal to 3.372 arc minutes
# one arc minute is 1/60th of a degree (0.016666...), or 1/21,600 of a full 360 circle
# 3.372 arc minutes is probably less error than the positional tollerance
# of the milling attachment spindle, however, for greater accuracy a gearbox with a further reduction ratio
# can be added to the system
totalsteps = 0 # total steps "register" (variable) starts at zero
n = 1 # intiate variable "n" ("n" for number of teeth slots cut)
#
# now that n has a value we can update page 3 to include that value as a variable that changes
# with each gear tooth slot cut
#
page3 = f"""C) RUN PROGRAM
{t} gear teeth calculated
{angle} degrees per tooth
You may now cut gear
slot {n} When finished
enter {n} (or 999 to
return to zero position) """
# next we have what I will call the minor while True loop that starts the gear slot cutting and then
# drops us into what I will call the major while true loop
#
# do the following while loop for the number of gear teeth (t) specified
# NOTE: we're calculating the next position in advance so that it can be displayed and the user can
# confirm that the data for the next position is correct before cutting the first position
# because of this the formulas that display the current position require subtracting the steps to the
# next position
#
while n <= t:
# the alert.play() line below and pygame import at beginning of the script play the audio prompt to
# the system sound device (HDMI out, USB speaker, headphone, etc) to indicate the next slot can be cut
# this is different than the buzzer audio which is to indicate that the motor is moving
#
alert.play() # play a brief system audio beep to signal that the gear slot can now be cut
#
# in the following print statement n is always 1 because after we pass this part of the script
# we drop into the major loop for the remainder of the slots
# the reason for this is so that we can drop out of the main loop before the last slot and advance
# back to the start position
#
print("You may now cut gear tooth slot",n)
print("")
try:
printToDisplay(page3)
except:
print("display error")
print("")
#
# calculate the total angle 'a' of the current position and subtract the n = 1 angle so the
# first cut starts at zero angle
a = 360.0/t*n-360.0/t
# print the current angle in degrees rounded to three decimal places to console
print("Angle: ",str(round(a,3)),"degrees")
# calculate current position in steps by multiplying steps-per-slot
# (6400/t) by current number of slots 'n'
absolute_position = (6400.0/t)*n
# print the current position as the current absolute position minus one gear tooth so the
# first cut starts at zero steps
print("Current position:",str(int(round(absolute_position-6400.0/t))),"steps of 6400 steps total")
# subtract totalsteps from absolute position to get newsteps
# this is where we use the non-zero absolute position to calculate how many new steps to advance
newsteps = int(round(absolute_position - totalsteps))
#
print("")
#
# now we drop into the major while True loop
#
while n < t: # until the last cut (n = t) repeat the following loop:
totalsteps = totalsteps + newsteps # accumulate the total steps with each pass through this loop
print("(next rotation will be",newsteps,"steps to angle",str(round(360.0/t*n,3)),"degrees)")
print(" ")
# do the following loop for the number of gear teeth (t) specified
# NOTE: this loop is for all slots subsequent to the first slot
while True:
try:
confirm = input("Enter completed slot number to continue (or '999' to return to zero): ")
print("")
if int(confirm) == int(n):
break
elif int(confirm) == 999:
n = t - 1
print("")
print("Motor will return to zero after the next cut position")
print("")
break
except:
print("Invalid input")
page3A = f"""C) RUN PROGRAM
Please wait while the motor
advances """
try:
printToDisplay(page3A)
except:
print("display error")
# the next line uses gpiozero TonalBuzzer to play an audio prompt on a hardware buzzer inside
# the controller
if z == 1:
b.play(Tone(220.0)) # play audio prompt through gpiozero tonal buzzer hardware
brakerelease.on()
print("Rotating to next cut position")
Motor2 = HR8825(dir_pin=24, step_pin=18, enable_pin=4, mode_pins=(21, 22, 27))
Motor2.TurnStep(Dir='forward', steps=newsteps, stepdelay = 0.003)
time.sleep(0.1)
last = str(n)
n = n + 1
page3 = f"""C) RUN PROGRAM
Slot {last} of {t} completed
You may now cut gear
slot {n}
When finished enter {n}
(or 999 to return to
zero position) """
time.sleep(0.1)
if z == 1:
b.stop()
brakerelease.off()
print(" ")
print("You may now cut gear tooth slot",n)
# the alert.play() line below and pygame import at beginning of script play audio prompts
# through system sound device (HDMI out, USB speaker, headphone, etc)
alert.play()
try:
printToDisplay(page3)
except:
print("display error")
a = 360.0/t*n-360.0/t
print("Angle: ",str(round(a,3)),"degrees")
absolute_position = (6400.0/t)*n
print("Current position:",str(int(round(absolute_position-6400.0/t))),"steps of 6400 steps total")
newsteps = int(absolute_position - totalsteps)
print("This is the final cut position")
print("The next calculated position is the zero position:",str(int(absolute_position)),"steps total")
print("")
while True:
try:
confirm = input("Enter completed slot number to continue: ")
if int(confirm) == int(n):
break
except:
print("Invalid input")
page3A = f"""C) RUN PROGRAM
Please wait while the motor
advances """
try:
printToDisplay(page3A)
except:
print("display error")
print(" ")
print("Rotating to initial cut position")
if z == 1:
b.play(Tone(220.0)) # play audio prompt through gpiozero tonal buzzer hardware
brakerelease.on()
Motor2 = HR8825(dir_pin=24, step_pin=18, enable_pin=4, mode_pins=(21, 22, 27))
Motor2.TurnStep(Dir='forward', steps=newsteps, stepdelay = 0.003)
if z == 1:
b.stop()
alert.play()
n = n + 1
print("Completed index cycle for ",t,"gear teeth")
time.sleep(0.5)
a = 360.0/t
page3 = f"""C) PROGRAM ENDED
{t} gear teeth cut
{angle} degrees per tooth
Press button 'D' on this unit
to continue
"""
try:
printToDisplay(page3)
except:
print("display error")
time.sleep(1)
print("")
print("Press button 'D' on the controller to continue")
print("")
buttonD.wait_for_press()
try:
endloop = input("Enter 0 to shut down, 1 to start over, or 2 to end the program: ")
print("")
if int(endloop) == 0: # end program and power off
print("Clear e-paper display") # print to console to indicate that e-paper display is being cleared
epd.Clear() # clear the e-paper display
time.sleep(2)
print("\nMotor stop")
Motor2.Stop()
os.system('sudo poweroff')
exit()
break
elif int(endloop) == 1: # start over at the top of process
print("Clear e-paper display") # print to console to indicate that e-paper display is being cleared
print("")
epd.Clear() # clear the e-paper display
time.sleep(2)
elif int(endloop) == 2: # terminate the program
exit()
except:
exit()
except:
print("Clear e-paper display") # print to console to indicate that e-paper display is being cleared
epd.Clear() # clear the e-paper display
epd2in7_V2.epdconfig.module_exit
print("\nMotor stop")
Motor2.Stop()
exit()
|